In this series of three posts, I demonstrate the installation and configuration of Microsoft’s Local Administrator Password Solution (LAPS). This is the first post that covers installation of the software on management computers and clients. For links to parts 2 and 3, see the bottom of this post.
What is LAPS?
LAPS is a solution to change the local administrator (SID -500) password on all domain joined computers to something complicated, unique, and regularly changed. Previously available only to those lucky customers who have Microsoft Premier agreements, Local Administrator Password Solution (LAPS) has recently been published for all customers as part of MSA 3062591.
The purpose of LAPS is, first and foremost, to secure Active Directory environments by ensuring that all computers have different and complex local administrator passwords. LAPS works by creating an attribute against the computer class in Active Directory. Permissions must be explicitly granted to allow users to view this password attribute. The benefit of this solution is that it’s very simple, relying purely on Active Directory and its supporting infrastructure.
What do I need?
You’ll need at least one management computer, and at least one client computer (which can be the same machine). In my margiestravel.com lab, I have the following setup:
- MTDC01 (Windows Server 2012 R2 Domain Controller) - LAPS Management Computer
- MTCL01 (Windows 7 Client) - LAPS Client
We’ll install the LAPS fat client, PowerShell module and Group Policy templates onto the Server 2012 R2 machine, and will work with MTCL01 as our client endpoint that will have their passwords changed. It’s important to note that this procedure is identical regardless of whether your ‘client’ computers are running a desktop or server operating system. You’ll also want to grab the bits I link to above from Technet, including the following components at a bare minimum:
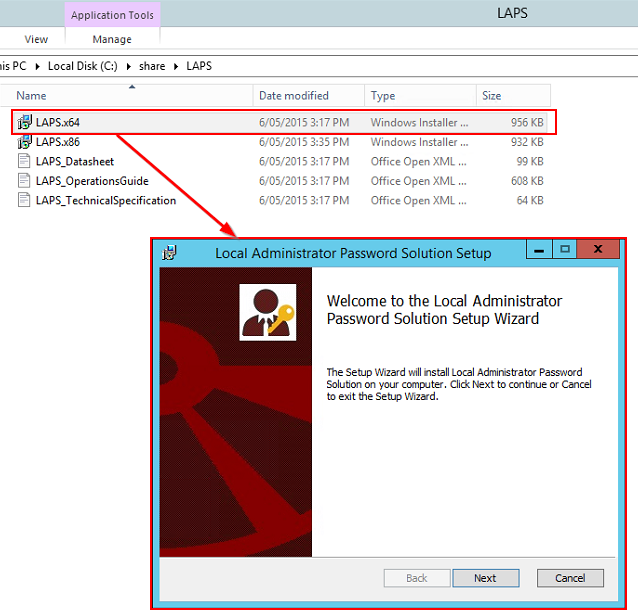
LAPS.x64.msifor Windows 64-bit management computersLAPS.x86.msifor Windows 32-bit management computers
How is it installed?
Installing the LAPS infrastructure couldn’t be much more trivial. Grab the installers and next/next/finish your way through them:
Management Computers
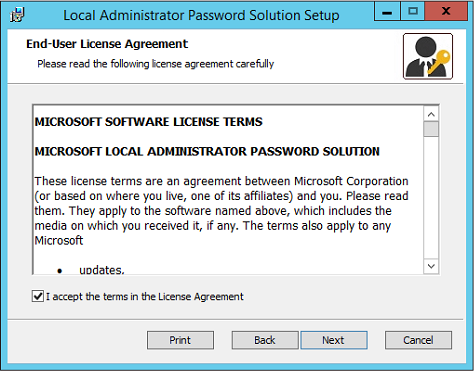
Read and accept the EULA over a strong glass of red:
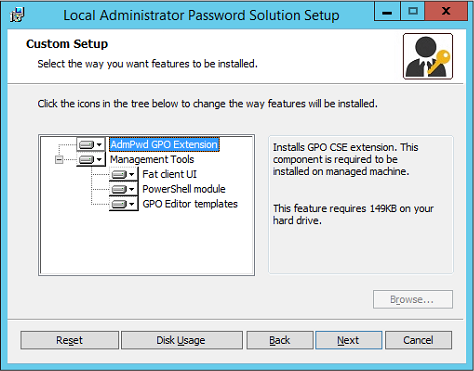
Choose the components you’d like installed. In my lab, I’m going to deploy the whole lot (because why not?).
Once you’re happy, click Install, accept the UAC prompt (you do have UAC enabled, right?) and you’ll be on your way.
Client Computers
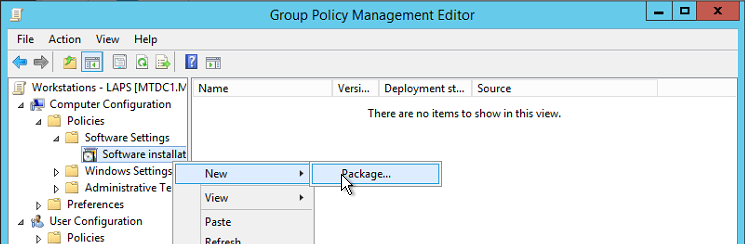
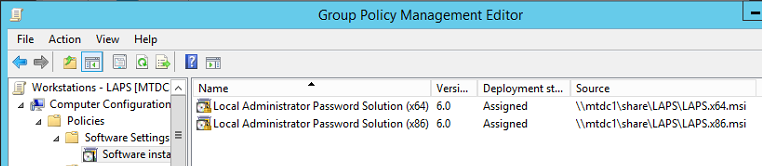
These are the machines that will have their passwords changed. It’s quite a simple install here, we just need to grab a DLL and register it. Because I’m lazy efficient, let’s create a group policy to run this installer. In a real environment, you’d definitely use ConfigMgr or something similar for this:
Be sure to edit the x86 package to uncheck the Make this 32-bit X86 application available to Win64 machines. option. This will ensure that 64-bit computers get the 64-bit DLL, and 32-bit machines get the 32-bit DLL. Super stuff, that.

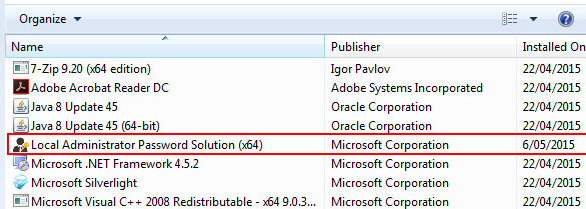
Once installed, you’ll see the Local Administrator Password Solution appear in Programs and Features:
What Else?
- See part 2 for configuring Active Directory
- See part 3 for configuring Group Policy and operating LAPS
Comments/questions
There's no commenting functionality here. If you'd like to comment, please either mention me (@[email protected]) on Mastodon or email me. I don't have any logging or analytics running on this website, so if you found something useful or interesting it would mean a lot to hear from you.