Upgrading from AD FS on Windows Server 2012 R2 (AD FS 3) is a relatively straightforward procedure, which can be completed easily using the AD FS installation and configuration wizards. Note: This information is compiled based on a preview build of Windows Server 2016 (Technical Preview 5). All information is subject to change in the public release of Windows Server 2016.
The Environment
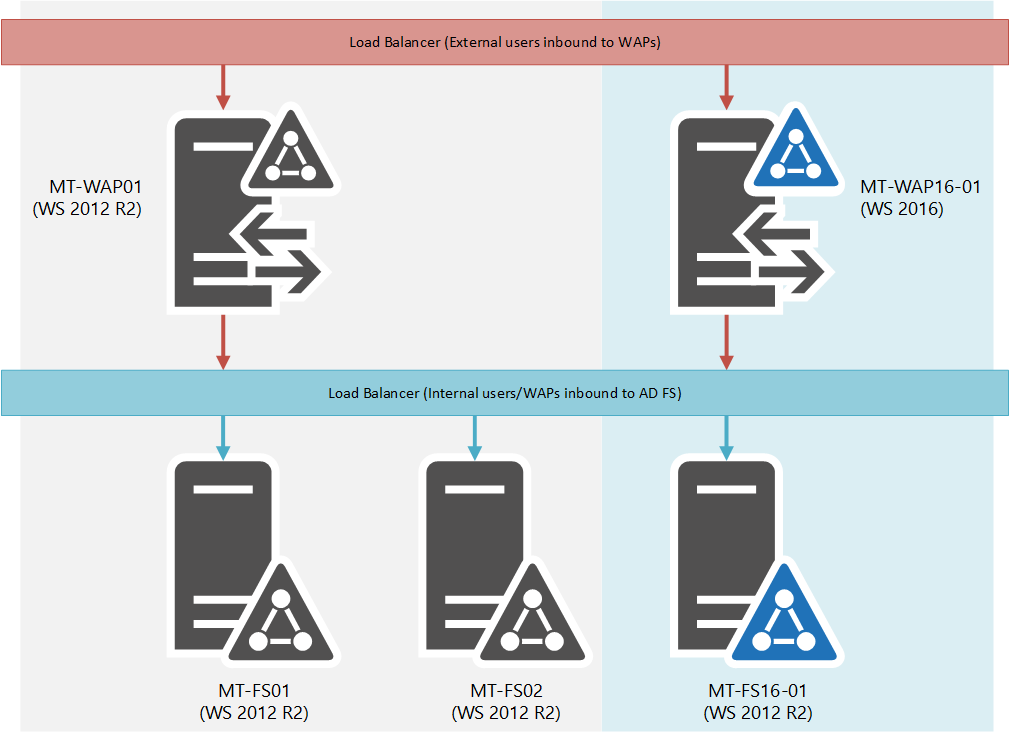
My environment, prior to any upgrade, looks like this:
- Active Directory domain
corp.margiestravel.com. One domain controller,MT-DC1.corp.margiestravel.com - Two AD FS servers,
MT-FS01.corp.margiestravel.comandMT-FS02.corp.margiestravel.com - AD FS servers load balanced by a Citrix NetScaler, though in theory, this should work with any other load balancing technology (F5, NLB, HAProxy)
- One Web Application Proxy,
MT-WAP01. Not domain joined - AD FS is published as
https://sts.margiestravel.com/
After upgrade, the following will be introduced:
- One AD FS server (Windows Server 2016),
MT-FS16-01.corp.margiestravel.comOne Web Application Proxy (Windows Server 2016),MT-WAP16-01. Not domain joined
The Process
Put simply, the upgrade procedure involves installing new Windows Server 2016 servers, installing the AD FS role, then adding them to the existing farm. One of the Windows Server 2016 servers should be enabled as the primary server. Once the servers are in the farm and services redirected to them, the old servers can be removed.
Step 1: Install the new AD FS Servers
I’ll assume you’re capable of installing Windows Server 2016, and capable of installing the AD FS role on the server. We’ll pick up at the “you must configure AD FS step”.
- Install the Service Communications certificate (this should match that on your other federation servers)
Import-PfxCertificate -FilePath C:\certs\mycert.pfx -CertStoreLocation 'cert:\localmachine\my' -Password $(Read-Host "PFX File Password -AsSecureString)-
Run the AD FS Configuration Wizard. Ensure the
Add a federation server to a federation server farmoption is selected. Click Next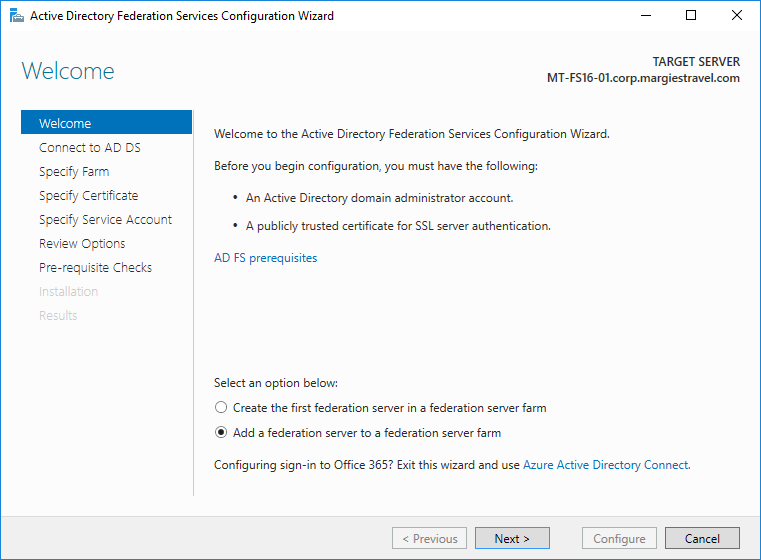
-
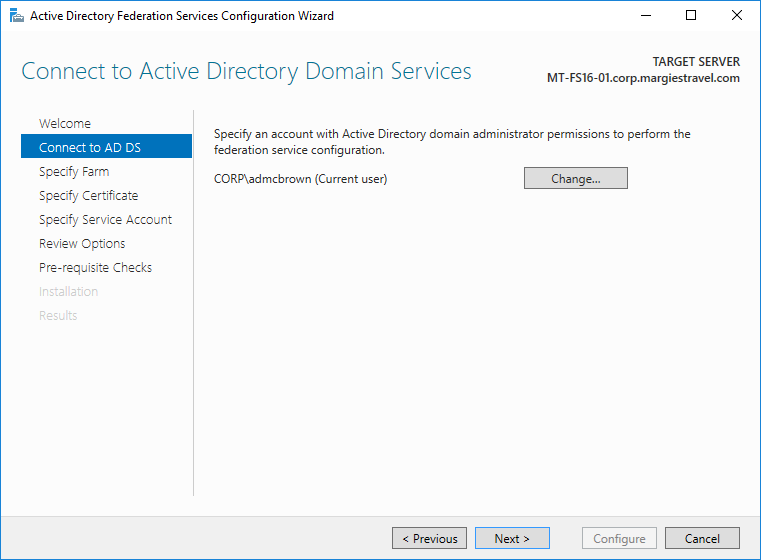
Choose an administrative user to run the wizard as. If you’re a domain administrator, you can just hit Next
-
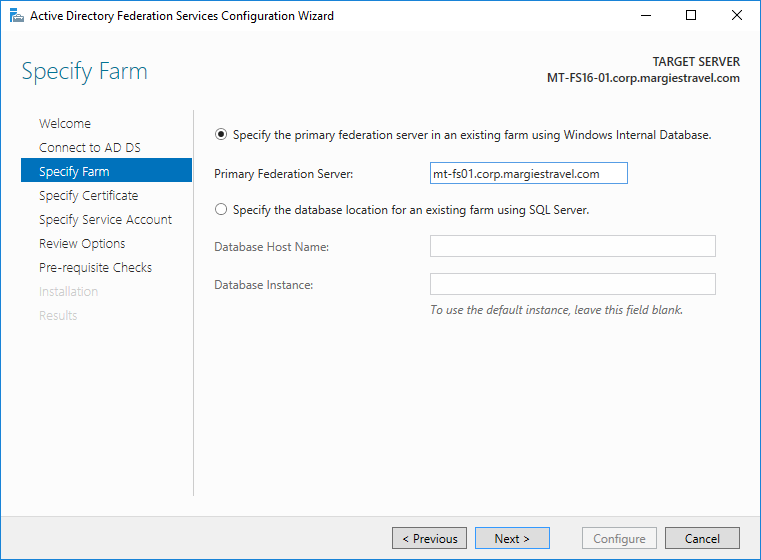
Enter the FQDN of the primary AD FS computer in the farm
-
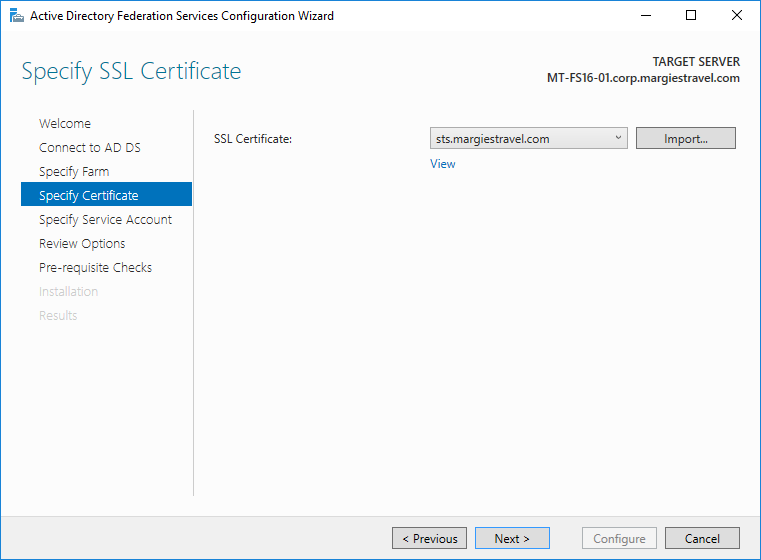
Select the certificate you installed earlier
-
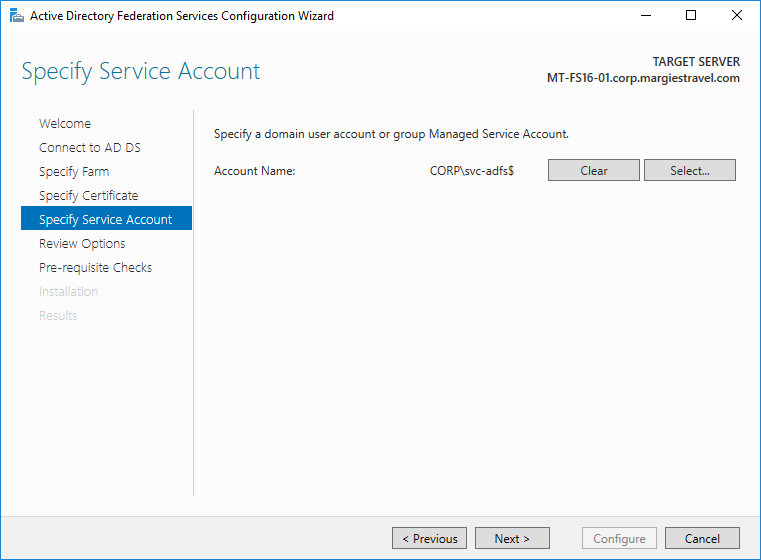
Either choose the gMSA in use, or enter the service account’s credentials
-
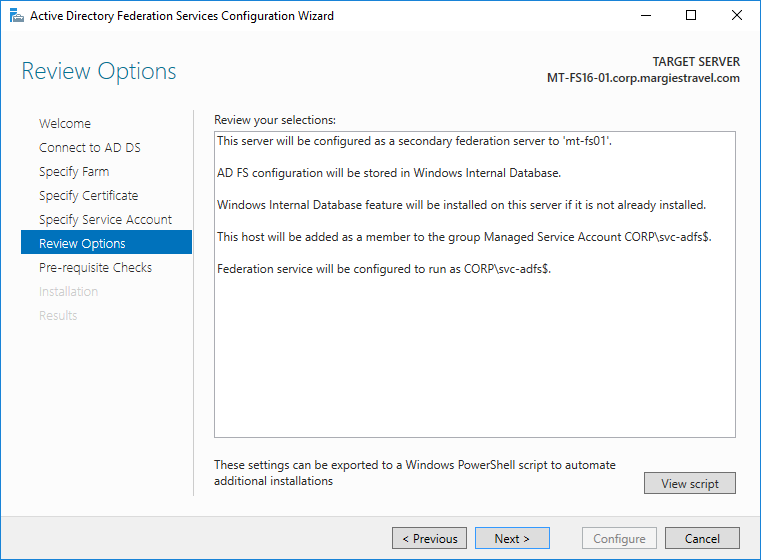
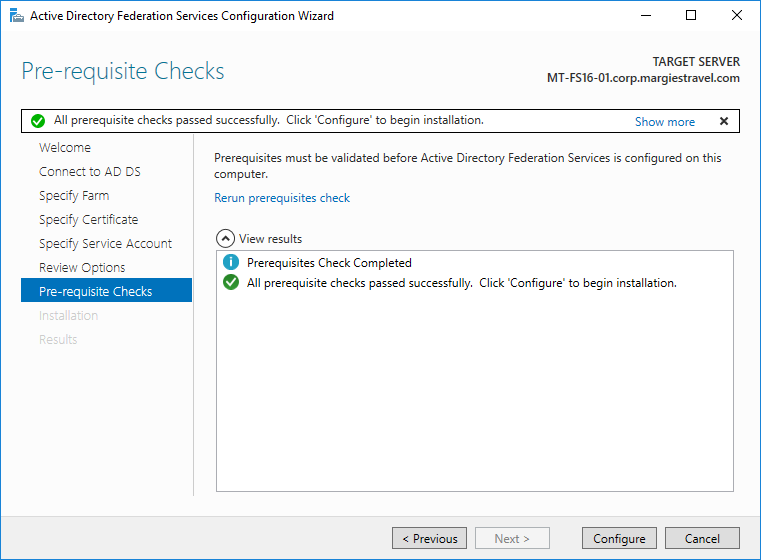
Review the configuration settings and hit Next. AD FS will configure on the server

Congratulations! Your AD FS farm now has a Windows Server 2016 server that can answer federation requests.
Step 2: Enable the new server(s) to receive requests
You can now shoot requests at these servers indiscriminately. AD FS on Windows Server 2016 behaves, from a user perspective, much the same way as AD FS on Windows Server 2012 R2, in this configuration.
Step 3: Promote a new server to be primary
AD FS has the concept of primary and secondary servers. Primary servers have a writable copy of the database, while secondary servers have a read-only replica of the database. Servers have no way of negotiating their role in the AD FS farm, so each computer must be updated manually: Firstly, on the new Windows Server 2016 computer, set it to be the primary computer. This enables its database for changes, and means it will no longer sync its configuration from the previous primary computer.
Set-AdfsSyncProperties -Role 'PrimaryComputer'
On all other AD FS servers, run the following command to enable them to retrieve their configuration from the new primary computer. All servers must be updated, as they’ll be configured to point to the old primary server which will soon be merely a secondary server.
On the computer that was previously the primary computer, run the following:
Set-AdfsSyncProperties -PrimaryComputerName 'newprimarycomputername' -Role 'SecondaryComputer'On other secondary computers, run the following:
Set-AdfsSyncProperties -PrimaryComputerName 'newprimarycomputername'
Step 4: Confirm functionality
Now that you’re running a Windows Server 2016 primary AD FS computer, you can start using some of the “cool new stuff” that comes with Windows Server 2016. Firstly, let’s use the new Get-AdfsFarmInformation cmdlet to make sure we can see our new server:
Get-AdfsFarmInformation | fl *WARNING: PS0334: Farm nodes running versions prior to 'Windows Server 2016 Technical Preview 5' will not show in the farm node list.
CurrentFarmBehavior : 1
FarmNodes : {MT-FS16-01.corp.margiestravel.com}
Perfect!
Step 5: Configure Web Application Proxies
There are two options to handle WAPs. WAPs can be replaced with a Windows Server 2016 server, or an existing Windows Server 2012 R2 WAP can be used.
Use existing Windows Server 2012 R2 WAPs
The great news here is that provided your Windows Server 2012 R2 servers can access the new AD FS server(s) by hostname, these will just keep on trucking
Deploy new Windows Server 2016 WAPs
If you want to go the whole hog and upgrade your WAPs to Windows Server 2016 at the same time, that’s pretty straightforward too. First, build yourself a Windows Server 2016 server or two and get them on your network. Don’t domain join them. Install the certificate you wish to use for the WAPs (typically the same as the internal AD FS servers, but not absolutely necessary. The name must match, at least.
-
Ensure that DNS resolution for your AD FS FQDN resolves to your internal AD FS load balancer. If it doesn’t, add an entry to the hosts file on each WAP:
192.168.32.35 sts.margiestravel.com
-
Install the Remote Access role with the WAP role feature:
Install-WindowsFeature Web-Application-Proxy -IncludeManagementTools- Make a note of the certificate thumbprint for your service communications certificate using the following PowerShell command:
Get-ChildItem cert:\localmachine\my | where {$_.Subject -notlike "*ProxyTrust*"}- Install the WAP into AD FS by running the following command on the WAPs:
Install-WebApplicationProxy -CertificateThumbprint 2D125F4D735DEF823178E8F17E6579D04FB97B7A -
FederationServiceName sts.margiestravel.com -FederationServiceTrustCredential $(Get-Credential)
You’ll now need to cut over your external load balancer or NAT rules to point incoming AD FS traffic to the newly configure WAPs.
Step 6: Decommission Windows Server 2012 R2 AD FS Servers
The good news is that your Windows Server 2012 R2 AD FS and WAP servers can now be removed – all functionality has been cut over to Windows Server 2016. How hard is that? Easy. Just uninstall AD FS or the Remote Access role from the servers.
Step 7: Raise the Farm Functional Level
Until now, your AD FS farm has been running at the Windows Server 2012 R2 farm behavior level (FBL). Do not confuse this with AD DS functional levels – these are totally different! Now that we’ve rid our farm of Windows Server 2012 R2 federation servers, we can enable all the cool new Windows Server 2016 AD FS functionality. This is done with a single PowerShell command that raises the functional level from 1 (Windows Server 2012 R2) to 3 (Windows Server 2016).
There is one important prerequisite to this: You must have extended your Active Directory Schema to support Windows Server 2016. It is not supported to utilise a Windows Server 2016 FBL without first using the Windows Server 2016 Active Directory schema. This is not the same as upgrading your domain and functional level, this is just adding the extra attributes used by Windows Server 2016 Domain Controllers. You can extend the schema manually (using ADPrep), or automatically by installing your first Windows Server 2016 domain controller.
To raise the AD FS FBL, open PowerShell as an Administrator and run the following command:
Invoke-AdfsFarmBehaviorLevelRaiseHit Y when prompted, and in a few minutes your farm will be running at functional level 3. We can verify this:
Get-AdfsProperties | Select CurrentFarmBehaviorHow cool’s that? Open up the AD FS console and you’ll see all the cool new commands. You’ll also be able to run a bunch of new stuff in the ADFS PowerShell module such as:
Test-AdfsFarmJoincmdlet Test-AdfsFarmJoin at command pipeline position 1
Supply values for the following parameters:
GroupServiceAccountIdentifier: CORP\svc-adfs$
PrimaryComputerName: mt-fs16-01
Message Context Status
------- ------- ------
Successfully verified the target computer is joined to a domain. PreCheckTest Success
group Managed Service Account was validated. PrerequisiteTest Success
group Managed Service Account password information was successfully retrieved. DeploymentTask Success
The Service SPN was successfully determined. DeploymentTask Success
The Farm Behavior Level was successfully determined. DeploymentTask Success
Configuration was successfully retrieved from the primary server. DeploymentTask Success
Simple as that! You’ve installed a Windows Server 2016 federation server, migrated all the responsibility to it, and decommissioned your Windows Server 2012 R2 AD FS boxes.
Comments/questions
There's no commenting functionality here. If you'd like to comment, please either mention me (@[email protected]) on Mastodon or email me. I don't have any logging or analytics running on this website, so if you found something useful or interesting it would mean a lot to hear from you.